
12 Genius Keto Meal Prep Ideas That’ll Save You Hours During the Week (Tip #3 is a Game Changer!)
Keto meal prep is a lifesaver when you’re trying to stick to that low-carb lifestyle while juggling a busy schedule.
Imagine having delicious, ready-to-eat meals waiting for you every day, making healthy eating a breeze rather than a chore.
From satisfying breakfasts to hearty dinners, these 12 genius meal prep ideas are not only easy but also super time-saving, ensuring you have the perfect fuel for your week ahead. Get ready to simplify your meal routine and enjoy tasty meals without the stress of daily cooking!
Contents
- 1. Zesty Lemon Garlic Chicken
- 2. Cauliflower Rice Stir-Fry
- 3. Spinach and Feta Egg Muffins (Game Changer!)
- 4. Beef and Broccoli Stir-Fry
- 5. Creamy Tuscan Garlic Salmon
- 6. Taco Lettuce Wraps
- 7. Greek Chicken Bowls
- 8. Cheesy Zucchini Casserole
- 9. Mackerel Salad Jars
- 10. Coconut Curry Chicken
- 11. Chocolate Avocado Pudding
- 12. Almond Butter Chia Pudding
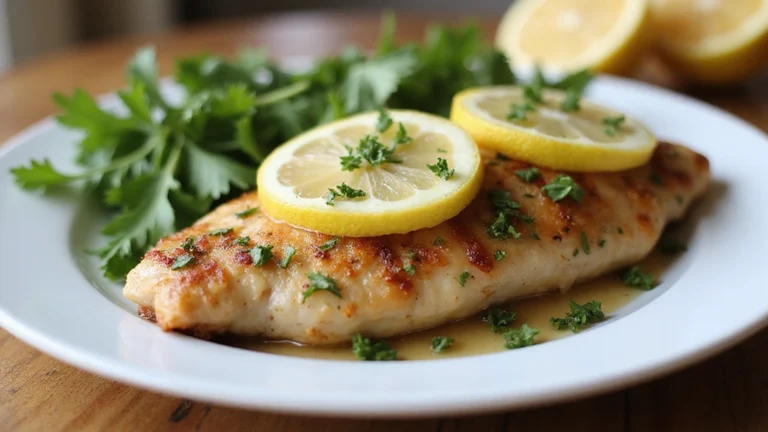
1. Zesty Lemon Garlic Chicken

Kick off your meal prep with this zesty lemon garlic chicken dish that’s bursting with flavor!
Marinated in a tangy lemon-garlic blend, this chicken is perfect for slicing and adding to salads or enjoying on its own. Plus, it’s packed with protein to keep you feeling full. Cook up a batch on Sunday night, and you’ll have protein ready to go for all your meals throughout the week. This dish pairs beautifully with steamed veggies or a fresh green salad, making it super versatile.
For a seamless cooking experience, consider using a garlic press like the Zulay Kitchen Premium Garlic Press Set. It simplifies the process of mincing garlic and saves you time, allowing you to focus on marinating the chicken to perfection.
Recipe Overview:
– Servings: 4
– Prep Time: 10 mins
– Cook Time: 20 mins
– Total Time: 30 mins
– Calories: 300 per serving
Ingredients:
– 4 boneless, skinless chicken breasts
– 1/4 cup olive oil
– Juice of 2 lemons
– 4 cloves garlic, minced
– Salt and pepper to taste
– Fresh parsley for garnish
Instructions:
1. In a bowl, mix olive oil, lemon juice, garlic, salt, and pepper.
2. Marinate the chicken breasts in the mixture for at least 30 minutes (or overnight).
3. Preheat your grill or skillet over medium heat.
4. Cook the chicken for about 7-8 minutes per side until fully cooked.
5. Let rest for a few minutes before slicing.
6. Store in meal prep containers like the Bentgo meal prep containers with your choice of veggies or salad.
– Try adding some red pepper flakes for a spicy kick!
– This chicken is also great cold in salads or wraps.
FAQ:
– Can I use a different protein? Yes, it works well with shrimp or tofu too!
– How long can I store it? It keeps well in the fridge for up to 5 days.
Using an olive oil spray bottle can help you evenly coat your chicken while controlling the amount of oil you use, ensuring a healthier dish without sacrificing flavor. With the right tools, your zesty lemon garlic chicken will be a breeze to prepare and delicious to enjoy throughout the week!
2. Cauliflower Rice Stir-Fry

Say goodbye to carbs with this quick and easy cauliflower rice stir-fry!
This meal prep staple is not just low-carb but also highly customizable. You can pack it with your favorite veggies and protein, making it a nutritious option for lunch or dinner. Seasoned perfectly with soy sauce and sesame oil, it’s savory and satisfying. For your convenience, consider using 365 by Whole Foods Market, organic riced cauliflower, which saves you the hassle of ricing a whole head of cauliflower. Make a big batch over the weekend, and you’ll be set for the week! It reheats beautifully, ensuring each bite stays flavorful and delicious.
Recipe Overview:
– Servings: 4
– Prep Time: 5 mins
– Cook Time: 15 mins
– Total Time: 20 mins
– Calories: 150 per serving
Ingredients:
– 1 head of cauliflower, riced (or 4 cups pre-riced)
– 1 cup mixed veggies (bell peppers, peas, carrots)
– 2 eggs, beaten
– 3 tablespoons soy sauce (or coconut aminos for a paleo option)
– 1 tablespoon sesame oil
– Green onions for garnish
Instructions:
1. Heat sesame oil in a large skillet over medium heat.
2. Add mixed veggies and sauté until tender.
3. Push veggies to one side of the skillet and pour in the beaten eggs, scrambling them on the other side.
4. Once the eggs are cooked, add cauliflower rice and soy sauce, stirring well to combine.
5. Cook for an additional 5-7 minutes until heated through and slightly crispy.
6. Garnish with green onions before serving.
– Frozen cauliflower rice works great too!
– Add leftover chicken or shrimp for extra protein.
For your meal prep needs, be sure to check out Bentgo meal prep containers. These lightweight, durable, and reusable containers make it easy to store and heat your delicious stir-fry throughout the week.
FAQ:
– Can I use brown rice instead? Yes, but it will not be keto-friendly.
– How long does it last in the fridge? Up to 4 days, stored in an airtight container.
3. Spinach and Feta Egg Muffins (Game Changer!)

These spinach and feta egg muffins are a game changer for breakfast preps! They’re utterly simple to whip up, and you can make a dozen at once, storing them in your fridge for quick grab-and-go meals. With protein-packed eggs, fresh spinach, and savory feta cheese, every bite is delicious and nutritious.
To make your muffin-making experience even easier, consider using a silicone muffin pan. This pan is not only BPA-free but also features a metal reinforced frame, ensuring your muffins pop out effortlessly after baking. You can prepare a large batch without worrying about sticking or cleanup hassles.
These muffins are also highly adaptable; feel free to add in your favorite veggies or proteins for a twist. They can be served warm or cold, making them versatile for any time of day!
Recipe Overview:
– Servings: 12 muffins
– Prep Time: 10 mins
– Cook Time: 20 mins
– Total Time: 30 mins
– Calories: 100 per muffin
Ingredients:
– 10 large eggs
– 2 cups fresh spinach, chopped
– 1 cup feta cheese, crumbled
– Salt and pepper to taste
– Optional: diced bell peppers, onions, or cooked bacon
Instructions:
1. Preheat the oven to 350°F (175°C) and grease a muffin tin with a bit of oil or cooking spray.
2. In a bowl, whisk together eggs, salt, and pepper using an egg whisk for a light and fluffy texture.
3. Stir in spinach, feta, and any optional ingredients.
4. Pour the mixture evenly into the muffin tin.
5. Bake for 20 minutes or until the eggs are set and golden on top.
6. Allow to cool before storing in airtight containers in the fridge. Using airtight food storage containers helps keep your muffins fresh for longer.
– Reheat in the microwave for 30 seconds for a quick breakfast.
– These freeze well; pop them in the microwave when you’re ready to eat.
FAQ:
– Can I use egg whites? Absolutely, for a lighter version!
– How long do they last? Up to a week in the fridge or 3 months in the freezer.
4. Beef and Broccoli Stir-Fry

Satisfy your takeout cravings with this easy beef and broccoli stir-fry! Packed with protein and nutrients, this dish is perfect for meal prepping. The tender beef and vibrant broccoli come together in a delicious soy sauce glaze that you’ll love. Make a big batch and portion it for the week. It’s fantastic served over cauliflower rice or alone for a filling meal.
With minimal prep and quick cooking time, this stir-fry will become a weekly staple! To make your meal prep even easier, consider using meal prep containers that are durable, reusable, and microwave-safe, making it simple to store and reheat your portions throughout the week. Plus, a quality non-stick skillet will ensure your stir-fry cooks evenly and doesn’t stick, providing a hassle-free cooking experience.
Recipe Overview:
– Servings: 4
– Prep Time: 10 mins
– Cook Time: 15 mins
– Total Time: 25 mins
– Calories: 350 per serving
Ingredients:
– 1 lb flank steak, thinly sliced
– 4 cups broccoli florets
– 1/4 cup soy sauce
– 2 tablespoons sesame oil
– 1 tablespoon garlic, minced
– 1 teaspoon ginger, minced
Instructions:
1. Marinate the beef in soy sauce for at least 15 minutes.
2. Heat sesame oil in a large skillet over high heat.
3. Add beef and stir-fry for about 3-4 minutes until browned.
4. Add broccoli, garlic, and ginger, and stir-fry for an additional 5 minutes until broccoli is tender.
5. Serve hot over cauliflower rice or on its own.
– Thinly slice your beef against the grain for maximum tenderness.
– You can add other vegetables like bell peppers or carrots for variety.
FAQ:
– Can I use chicken instead? Yes, it works well with chicken breast too!
– How long can I store it? Up to 4 days in the fridge.
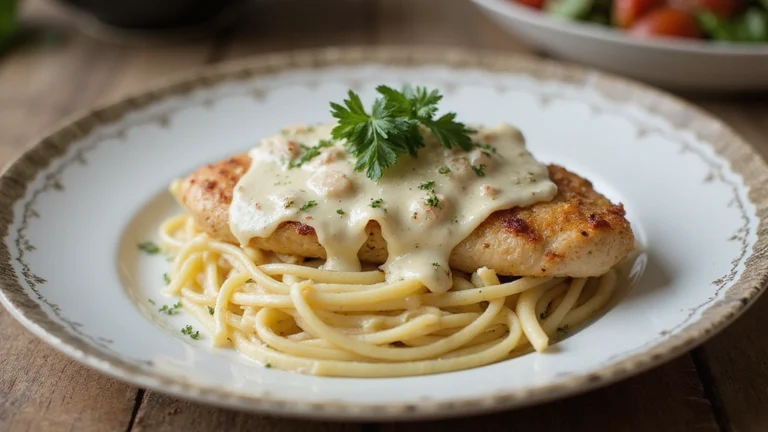
5. Creamy Tuscan Garlic Salmon

Transport your taste buds to Italy with this creamy Tuscan garlic salmon dish! Rich, creamy, and bursting with flavor, this dish is ideal for meal prep and can be served with a side of zoodles (zucchini noodles) or sautéed spinach. For effortless zoodle prep, consider using a zoodle maker, which cuts your zucchini into perfect noodles. The salmon is cooked perfectly and smothered in a cream sauce with spinach and sun-dried tomatoes, making every bite a treat. Plus, it’s packed with omega-3 fatty acids, keeping you healthy and satisfied all week long.
Recipe Overview:
– Servings: 4
– Prep Time: 10 mins
– Cook Time: 15 mins
– Total Time: 25 mins
– Calories: 400 per serving
Ingredients:
– 4 salmon fillets
– 1 cup heavy cream
– 2 cups spinach
– 1/2 cup sun-dried tomatoes, chopped
– 3 cloves garlic, minced
– Salt and pepper to taste
Instructions:
1. Season salmon with salt and pepper and cook in a skillet over medium heat for 4-5 minutes per side.
2. Remove salmon and set aside. In the same skillet, add garlic and sauté for 1 minute.
3. Stir in heavy cream, sun-dried tomatoes, and spinach, cooking until spinach wilts.
4. Return salmon to the skillet, allowing it to heat through in the sauce for 2-3 minutes.
5. Serve immediately or store in meal prep containers. A great option for storing is meal prep containers, which are microwave, freezer, and dishwasher safe for easy cleanup.
– Garnish with fresh basil for extra flavor.
– This dish pairs wonderfully with a side of roasted asparagus.
FAQ:
– Can I use fresh tomatoes instead? Yes, it will change the flavor, but is still delicious!
– How long does it last in the fridge? Up to 4 days.
For your creamy Tuscan garlic salmon, make sure to have high-quality ingredients like heavy cream on hand to ensure the sauce is as rich and satisfying as possible. Enjoy your meal prep with these handy tools!
6. Taco Lettuce Wraps

### 6. Taco Lettuce Wraps
Taco night just got a makeover with these fresh taco lettuce wraps! Perfect for meal prepping, these wraps are low-carb and loaded with flavor. Using crispy lettuce leaves instead of tortillas, you can pack them with seasoned ground beef or turkey, topped with your favorite toppings like cheese, avocado, and salsa. They’re great for lunches or quick dinners, and the best part? You can make the filling ahead of time!
To keep your meal prep organized, consider using meal prep containers that are lightweight, durable, and BPA-free. These containers are perfect for storing your taco filling in the fridge, keeping everything fresh and ready to grab throughout the week.
**Recipe Overview:**
– Servings: 4
– Prep Time: 10 mins
– Cook Time: 15 mins
– Total Time: 25 mins
– Calories: 250 per serving (2 wraps)
**Ingredients:**
– 1 lb ground beef or turkey
– 1 tablespoon taco seasoning
– 1 head of romaine or butter lettuce, leaves separated
– Toppings: cheese, avocado, salsa, sour cream, etc.
**Instructions:**
1. In a skillet, cook ground meat over medium heat until browned.
2. Add taco seasoning and 1/4 cup of water, simmering until the liquid is reduced.
3. Assemble wraps by filling lettuce leaves with meat and toppings.
4. Serve immediately or keep the filling in the fridge for up to 4 days.
– Make a larger batch of filling to use throughout the week.
– Try adding diced tomatoes or onions for extra crunch!
To easily cut your lettuce without browning, use a lettuce knife. This serrated knife is great for slicing through heads of lettuce cleanly, making your prep efficient and mess-free.
For added convenience, stock up on taco seasoning mix to ensure your meat is perfectly seasoned every time. Having a larger container on hand means you can whip up a delicious batch of filling quickly.
**FAQ:**
– Can I use chicken instead? Yes, shredded chicken works wonderfully.
– How long does the filling last? Up to 5 days in the fridge.
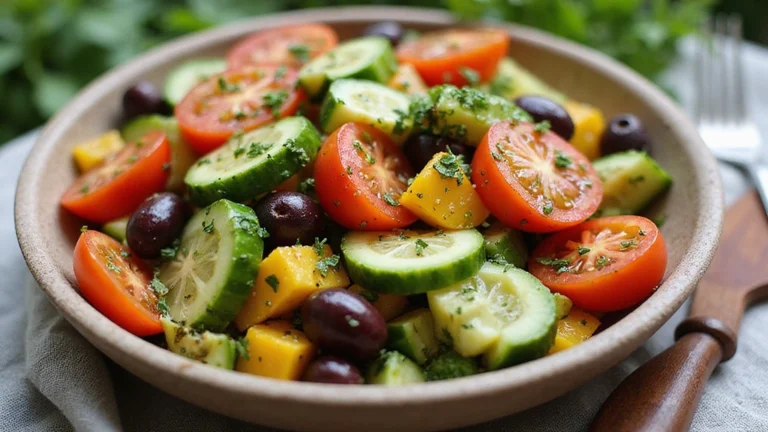
7. Greek Chicken Bowls

Transport yourself to the Mediterranean with these delicious Greek chicken bowls!
Every bowl is a meal in itself, packed with juicy grilled chicken, crunchy cucumbers, ripe tomatoes, and Kalamata olives, all topped off with a drizzle of tzatziki sauce. They’re colorful, refreshing, and incredibly satisfying, making them perfect for meal prep. To keep your meal prep organized and efficient, consider using meal prep containers. These lightweight and durable containers are microwave, freezer, and dishwasher safe, making it easy to store your Greek chicken bowls for the week.
You can customize your bowls with your favorite toppings, ensuring variety throughout the week. These bowls are not only healthy but also nutritious, keeping your meal prep exciting and delicious!
Recipe Overview:
– Servings: 4
– Prep Time: 15 mins
– Cook Time: 20 mins
– Total Time: 35 mins
– Calories: 350 per serving
Ingredients:
– 4 boneless chicken thighs
– 1 tablespoon olive oil
– 1 teaspoon oregano
– Salt and pepper to taste
– 2 cups chopped romaine
– 1 cup cherry tomatoes, halved
– 1 cup cucumber, diced
– 1/2 cup Kalamata olives
– Tzatziki sauce for drizzling
Instructions:
1. Marinate the chicken thighs in olive oil, oregano, salt, and pepper for at least 30 minutes.
2. Grill chicken over medium heat until cooked through, about 7-8 minutes each side.
3. In your meal prep containers, layer chopped romaine, grilled chicken, tomatoes, cucumber, and olives.
4. Drizzle with tzatziki sauce before serving.
If you want to enhance your tzatziki sauce, consider making it from scratch by combining Greek yogurt, cucumber, garlic, and lemon juice. To save time and ensure the perfect flavor, you can use a tzatziki sauce mix for added convenience. These bowls are also amazing with added feta cheese!
FAQ:
– Can I use chicken breast? Yes, you can use either; both are delicious.
– How long do they last? Up to 4 days in sealed containers.
For cooking, you might find it helpful to use an olive oil spray bottle. This handy tool allows you to dispense just the right amount of oil while grilling your chicken, ensuring they are perfectly seasoned without excess oil. Enjoy your flavorful Greek chicken bowls, and make meal prep a breeze!
8. Cheesy Zucchini Casserole

Indulge in this cheesy zucchini casserole that’s as comforting as it is healthy! This dish is not only delicious but also a great way to sneak in some veggies. With layers of zucchini, cheese, and a creamy sauce, this casserole is satisfying and perfect for meal prep. It reheats well, making it an excellent choice for quick lunches or dinners. You can enjoy it on its own or as a side dish, and trust me, your family will love it!
To make your meal prep even easier, consider using meal prep containers. These containers are reusable, sturdy, and leak-proof, making them perfect for storing your cheesy zucchini casserole and keeping it fresh in the fridge for up to 5 days.
For grating cheese with ease, the cheese grater is a fantastic tool. Its rotary design and non-slip suction base allow you to shred cheese quickly for your casserole, ensuring that you get that perfect melty topping every time.
Recipe Overview:
– Servings: 6
– Prep Time: 15 mins
– Cook Time: 30 mins
– Total Time: 45 mins
– Calories: 250 per serving
Ingredients:
– 4 medium zucchinis, sliced
– 1 cup heavy cream
– 1 cup shredded cheese (cheddar or mozzarella)
– 2 eggs
– Salt and pepper to taste
Instructions:
1. Preheat oven to 375°F (190°C).
2. In a bowl, mix heavy cream, eggs, cheese, salt, and pepper.
3. In a greased baking dish, layer zucchini slices and pour the cream mixture over the top.
4. Bake for 30 minutes until the top is bubbly and golden.
5. Let cool slightly before serving or storing in meal prep containers.
– Add ground meat to increase protein content.
– Top with fresh herbs like basil or parsley for extra flavor.
FAQ:
– Can I use other vegetables? Yes, it works with eggplant or bell peppers too!
– How long does it last? Up to 5 days in the fridge.
9. Mackerel Salad Jars

### 9. Mackerel Salad Jars
Get your healthy fats with these quick and delicious mackerel salad jars! These salads are not only eye-catching but also incredibly easy to make. Layered with fresh greens, protein-rich mackerel, and colorful veggies, they’re perfect for a nutritious lunch on the go. Storing your ingredients in jars keeps them fresh and crisp, ready to be devoured anytime. You can switch up the veggies based on the season, ensuring variety in your meal prep each week.
For perfect storage, consider using mason jars for meal prep. These glass jars with airtight lids are ideal for keeping your salads crisp and your ingredients intact, making them a fantastic option for meal prepping.
**Recipe Overview:**
– Servings: 4
– Prep Time: 10 mins
– Total Time: 10 mins
– Calories: 250 per serving
**Ingredients:**
– 2 cans of mackerel in olive oil
– 4 cups mixed greens
– 1 cup cherry tomatoes, halved
– 1 cucumber, diced
– 1/4 red onion, thinly sliced
– Optional: avocado for topping
**Instructions:**
1. In a clean jar, layer the ingredients starting with dressing, followed by onions, cucumbers, tomatoes, greens, and mackerel on top.
2. Seal the jar and store in the fridge.
3. When ready to eat, shake to combine and enjoy.
To make your salads even more flavorful, a handy salad dressing shaker can help you easily mix up your dressings without any mess. Just add your favorite dressing at the bottom of the jar to avoid soggy greens!
– Use different fish like tuna or salmon for variation.
– These jars will last up to 4 days in the fridge, making them a convenient option for busy weeks.
**FAQ:**
– Can I use leftovers? Absolutely, just ensure the ingredients are fresh!
Adding an olive oil spray bottle can also be a game changer. It allows you to control the amount of oil you add without overdoing it, keeping your salads light and keto-friendly.
With these tips and the right tools, you’ll be well-equipped to create delicious mackerel salad jars that save you time and keep you on track with your meal prep!
10. Coconut Curry Chicken

Warm up your week with this creamy coconut curry chicken that’s packed with flavor! The rich coconut milk combined with aromatic spices creates a comforting dish that is sure to please the palate. Serve it with cauliflower rice for a complete meal. Not only is this dish easy to prepare, but it can simmer while you get on with your day, making it perfect for meal prep. Enjoy the leftovers throughout the week, each bite becoming more flavorful!
This recipe is a breeze to make, and for efficient storage, consider using meal prep containers. They’re lightweight, durable, and reusable, helping you to organize your meals conveniently.
Recipe Overview:
– Servings: 4
– Prep Time: 10 mins
– Cook Time: 30 mins
– Total Time: 40 mins
– Calories: 400 per serving
Ingredients:
– 1 lb chicken thighs, cubed
– 1 can coconut milk
– 2 tablespoons curry powder
– 1 cup bell peppers, chopped
– 1 onion, diced
– Salt and pepper to taste
Instructions:
1. In a large pot, heat oil over medium heat and cook onions until translucent.
2. Add chicken and cook until browned.
3. Stir in curry powder, bell peppers, and coconut milk, bringing to a simmer.
4. Cook for 25 minutes until chicken is cooked through and flavors meld.
5. Serve over cauliflower rice or store in meal prep containers for the week.
– Adjust the spice level by adding chili flakes or using a spicier curry powder.
– This dish freezes well for later use.
FAQ:
– Can I use other proteins? Yes, shrimp or tofu can work just as well.
– How long does it last? Up to 5 days in the fridge.
11. Chocolate Avocado Pudding

Indulge your sweet tooth with this healthy chocolate avocado pudding! It’s rich, creamy, and loaded with healthy fats, making it a perfect keto-friendly dessert. The best part? It’s incredibly easy to make! Just blend ripe avocados with unsweetened cocoa powder, a keto-friendly sweetener, and a little vanilla extract. For a seamless blending experience, consider using a high-quality blender like the Hamilton Beach Power Elite Wave Action Blender, which features 12 functions including puree and crush ice, ensuring your pudding is completely smooth.
This treat can be prepared in advance, satisfying your chocolate cravings without the guilt. Just remember to store it in durable containers like the meal prep containers from Bentgo. These BPA-free containers are perfect for refrigeration and can be easily heated in the microwave or cleaned in the dishwasher.
Recipe Overview:
– Servings: 4
– Prep Time: 5 mins
– Total Time: 5 mins
– Calories: 200 per serving
Ingredients:
– 2 ripe avocados
– 1/2 cup unsweetened cocoa powder
– 1/3 cup sweetener of choice (like erythritol or stevia)
– 1 teaspoon vanilla extract
– Pinch of salt
Instructions:
1. In a blender, combine avocados, cocoa powder, sweetener, vanilla, and salt.
2. Blend until completely smooth, scraping down the sides as needed.
3. Taste and adjust sweetness if desired.
4. Spoon into small cups and refrigerate for at least 30 minutes before serving.
– Top with whipped cream or berries for an added treat.
– This pudding can be stored in the fridge for up to 3 days.
FAQ:
– Can I use other flavors? Yes, swap cocoa for peanut butter or add a hint of espresso for variety.
– How long does it last? Up to 3 days in the fridge.
For an added sweetener, try out Keto-Friendly Sweetener, like WHOLE EARTH 100% Erythritol, which is a great zero-calorie, plant-based sugar alternative that will keep your dessert guilt-free.
12. Almond Butter Chia Pudding

End your meal prep week with a delightful almond butter chia pudding! This nutritious dessert is perfect for breakfast or a snack and can be made in just minutes. Using BetterBody Foods Organic Chia Seeds, you can soak them in almond milk to form a gel-like consistency, creating the perfect base for your almond butter. Top it with nuts, berries, or coconut flakes for added texture. Make a big batch on Sunday, and you’ll have easy, healthy snacks ready to go!
Recipe Overview:
– Servings: 4
– Prep Time: 5 mins
– Total Time: 5 mins (plus overnight chilling)
– Calories: 250 per serving
Ingredients:
– 1/2 cup chia seeds
– 2 cups almond milk (try Silk Shelf-Stable Almond Milk for a creamy, dairy-free option)
– 1/4 cup almond butter (opt for Barney Butter Almond Butter for a smooth texture)
– 2 tablespoons sweetener of choice
– Berries and nuts for topping
Instructions:
1. In a bowl, mix chia seeds, almond milk, almond butter, and sweetener.
2. Stir well to combine, ensuring no clumps remain.
3. Refrigerate overnight (or at least 4 hours) until thickened.
4. Serve with toppings of your choice.
– Experiment with different nut butters for variety.
– This pudding stores well in the fridge for up to 5 days.
FAQ:
– Can I use regular milk? Yes, but it won’t be dairy-free.
– How long does it last? Up to 5 days in the fridge.
Conclusion

There you have it! Twelve ingenious keto meal prep ideas that will make your week so much easier.
With these delicious recipes, you can say goodbye to the stress of daily cooking and hello to flavorful, nutritious meals that keep you on track with your keto lifestyle.
Give them a try and let the meal prep magic transform your busy week into a breeze!
Note: We aim to provide accurate product links, but some may occasionally expire or become unavailable. If this happens, please search directly on Amazon for the product or a suitable alternative.
This post contains Amazon affiliate links, meaning I may earn a small commission if you purchase through my links, at no extra cost to you.
Frequently Asked Questions
What are the benefits of keto meal prep?
Keto meal prep is a total game changer! Not only does it save you time during your busy week, but it also helps you stick to your low-carb lifestyle. With prepped meals, you can avoid the temptation of high-carb foods and ensure you always have delicious, keto-friendly options on hand. Plus, it can save you money by reducing food waste and takeout expenses!
How do I get started with keto meal prep?
Starting with keto meal prep is easier than you think! Begin by selecting a few recipes from the article that excite you. Make a shopping list of the ingredients you’ll need and dedicate a few hours on the weekend to cook and portion everything out. Invest in some good-quality containers for storage. It’s all about planning ahead, so you can enjoy stress-free meals throughout the week!
Can I customize these meal prep recipes?
Absolutely! One of the best parts of keto meal prep is how customizable it is. Feel free to swap out proteins or veggies based on your preferences or what’s in season. Want to add more spice to that creamy Tuscan garlic salmon? Go for it! Just remember to keep an eye on the carb counts, especially if you’re experimenting with new ingredients.
How long can I store my keto meal preps?
Most keto meal preps can be stored in the fridge for about 3 to 5 days, depending on the ingredients. If you want to extend the shelf life, consider freezing individual portions. Most cooked proteins and vegetables freeze well, allowing you to enjoy your meals even longer. Just make sure to label your containers with dates – you’ll be glad you did when you’re searching for that tasty taco lettuce wrap!
Are there any tips for making keto meal prep easier and more efficient?
Definitely! To streamline your keto meal prep, consider batch cooking your proteins and veggies at once. Use a slow cooker or instant pot for hands-off cooking. Keep your recipes simple and focus on meals that share ingredients to minimize prep time. Also, don’t forget to invest in good storage containers to keep everything organized and fresh. Trust us, once you get in the groove, you’ll wonder how you ever lived without it!