
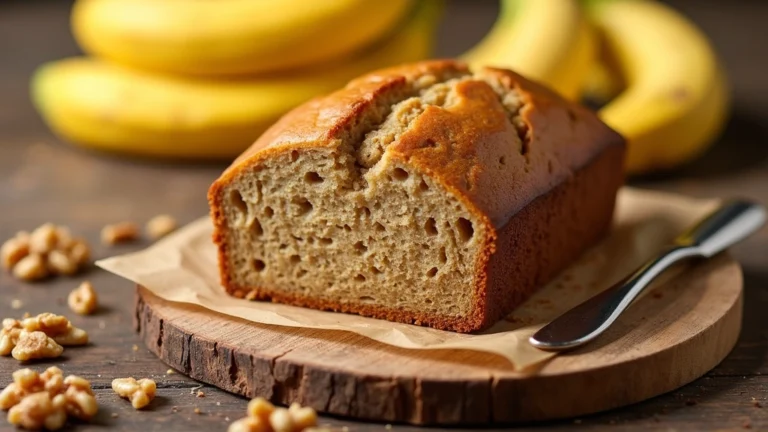
Ultimate Sourdough Focaccia Recipe: Crispy, Chewy, and Full of Flavor
This classic Ultimate Sourdough Focaccia recipe brings together centuries of culinary tradition with modern techniques to create a dish that’s both comforting and elegant.
The harmonious balance of crispy crust, chewy interior, and rich olive oil flavor creates a memorable dining experience that will have everyone asking for your secret.
I discovered this recipe during my travels through Italy, where local chefs have perfected it through generations of careful refinement.
Whether you’re preparing a casual family dinner or hosting a special celebration, this sourdough focaccia delivers impressive results with straightforward preparation.
The History and Cultural Significance
• Ultimate Sourdough Focaccia traces its origins to the Ligurian region of Italy, where it was originally created by Roman bakers.
• The dish evolved over decades as the use of wild yeast cultures became common, eventually becoming the beloved version we know today.
• In Italian culture, this dish traditionally appears at family gatherings and celebrations, symbolizing abundance and hospitality.
• While many variations exist across different regions, the authentic version maintains a unique texture and flavor profile that sets it apart from imitations.
Recipe Overview
Nutritional Information (per serving)
Essential Equipment Guide
Mixing Bowl: A large mixing bowl is essential for developing the dough. A glass or ceramic bowl helps maintain the temperature needed for proper yeast activity.
Baking Sheet: A high-quality, heavy-duty baking sheet ensures even baking and a crispy crust. Alternatives include a cast-iron skillet or pizza stone for different texture outcomes.
Bench Scraper: This tool is vital for managing the sticky dough and making clean cuts. Look for a sturdy, stainless steel scraper with measurement markings for versatility.
Ingredients
For the Dough
200|grams|sourdough starter|active and bubbly
500|grams|all-purpose flour|for structure
10|grams|salt|enhances flavor
350|ml|water|room temperature
60|ml|olive oil|adds richness and flavor
For the Topping
30|ml|olive oil|for drizzling
1|tablespoon|coarse sea salt|for texture and flavor
1|tablespoon|fresh rosemary|chopped, for aromatic flavor
Preparation Methods
Autolyse: This technique involves mixing flour and water and letting it rest before adding salt and starter. It allows the flour to fully hydrate and gluten to develop, resulting in better dough texture.
Stretch and Fold: This method replaces traditional kneading. It strengthens the dough structure and improves texture by gently stretching and folding the dough at intervals.
Fermentation: Allowing the dough to ferment for an extended period at a cool temperature develops flavor complexity and improves digestibility. Timing and temperature control are crucial for success.
Step 1: Activate Sourdough Starter
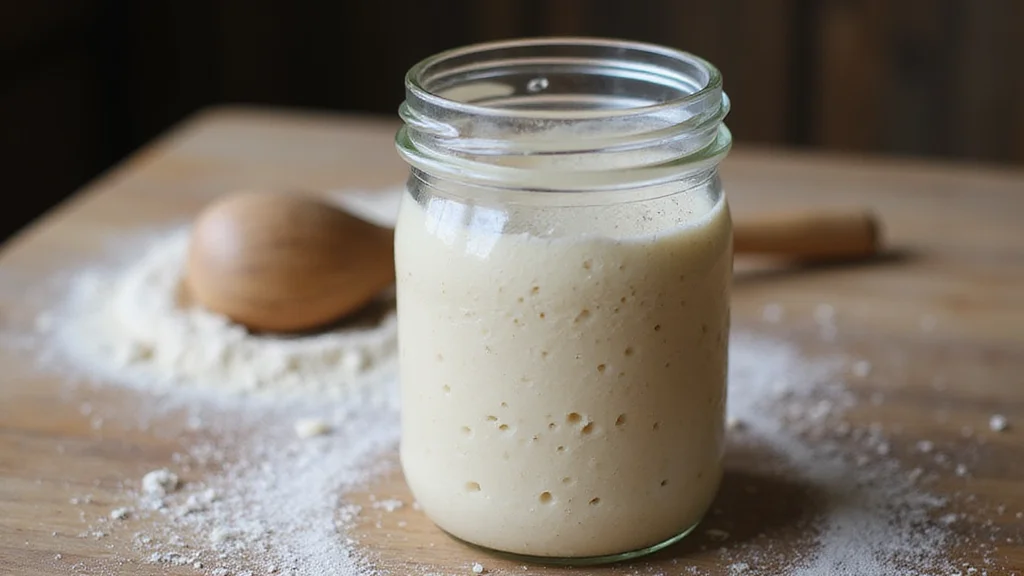
Take your sourdough starter out of the refrigerator.
Feed it with equal parts flour and water and let it sit at room temperature.
Wait until it becomes bubbly and doubles in size, indicating it's ready to use.
This may take 4-6 hours depending on the ambient temperature.
Step 2: Mix Ingredients
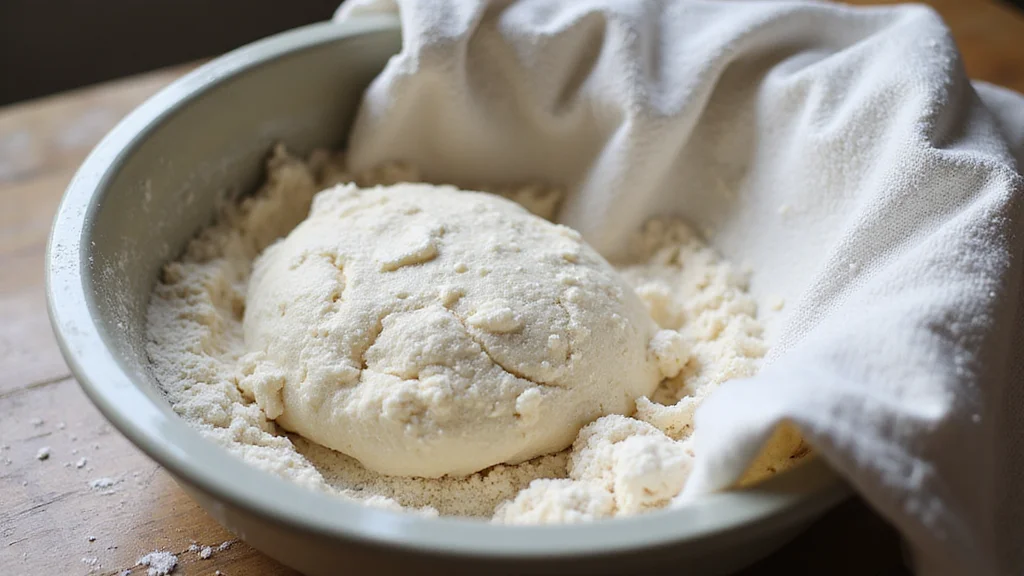
In a large mixing bowl, combine all-purpose flour and water.
Stir until no dry flour remains, then cover the bowl with a damp towel.
Let the mixture sit for 30 minutes to autolyse.
This rest period improves the dough's gluten structure.
Step 3: Add Starter and Salt
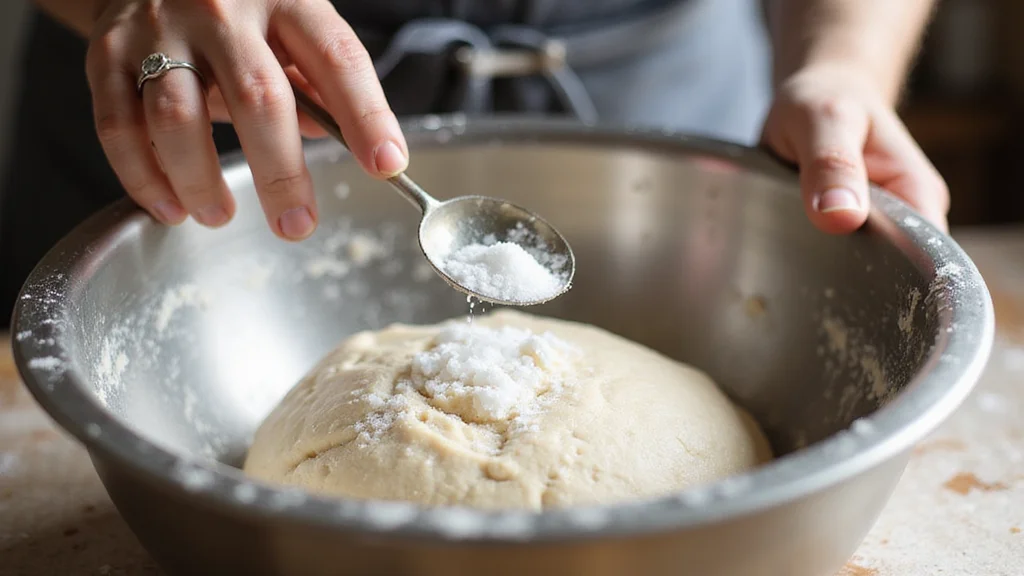
Add the activated sourdough starter and salt to the autolysed dough.
Mix thoroughly until the ingredients are well incorporated.
Use a dough scraper if needed to ensure even distribution.
The dough should be sticky but cohesive.
Step 4: Perform Stretch and Fold
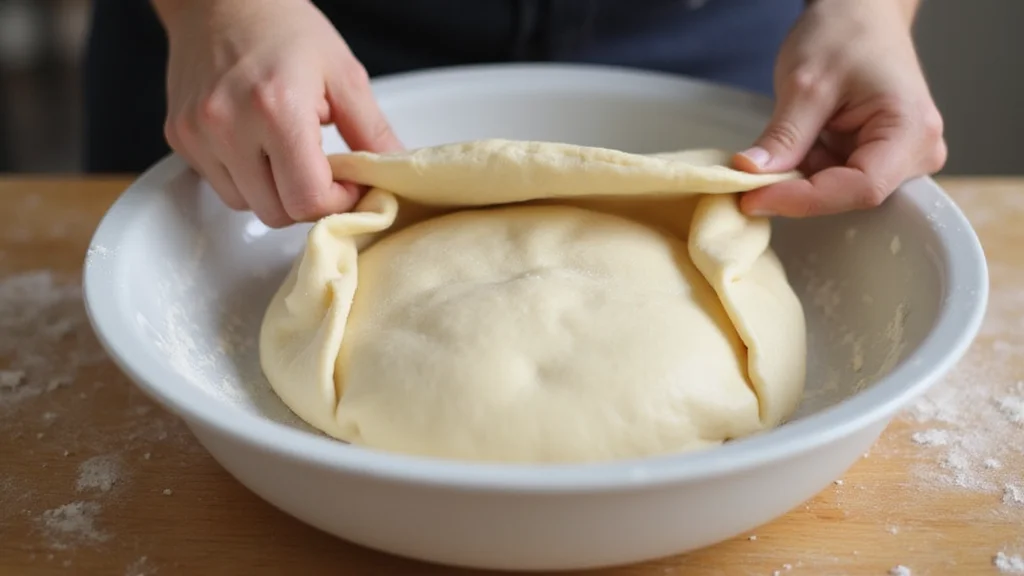
Begin the first stretch and fold by gently stretching one side of the dough and folding it over itself.
Rotate the bowl and repeat the process for all four sides.
Cover the bowl and let the dough rest for 30 minutes.
Repeat this process every 30 minutes for a total of four cycles.
Step 5: Bulk Fermentation
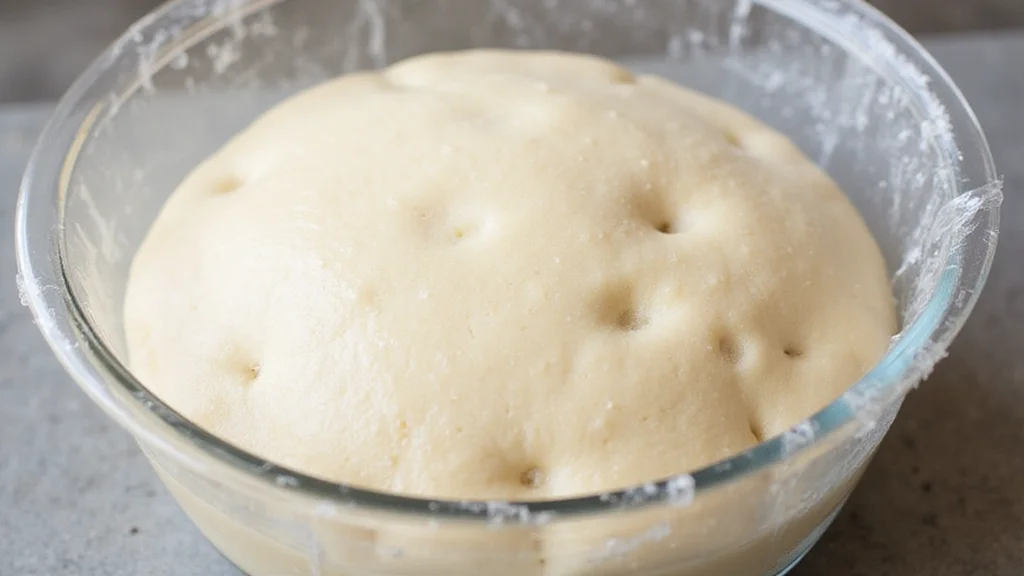
After the final stretch and fold, cover the bowl tightly with plastic wrap.
Let the dough bulk ferment at room temperature for 4-6 hours.
The dough should double in size and show visible bubbles on the surface.
This slow fermentation enhances the dough's flavor and texture.
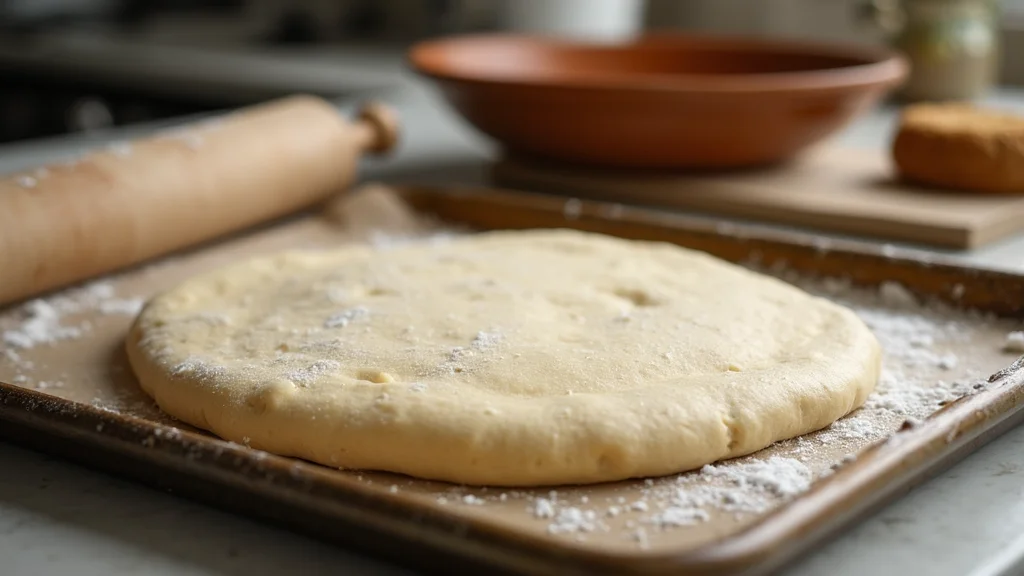
Step 6: Shape the Dough
Generously oil a baking sheet with olive oil.
Transfer the dough onto the baking sheet using a bench scraper.
Gently spread the dough to fit the dimensions of the pan without deflating it.
Let the dough relax for 30 minutes to settle into shape.
Step 7: Final Proof
Cover the baking sheet with a damp towel and let the dough proof for 1-2 hours.
The dough should become puffy and increase in volume.
This final rise will contribute to a lighter texture.
Ensure the kitchen is at a warm, draft-free temperature for optimal proofing.
Step 8: Prepare for Baking
Preheat your oven to 220°C (430°F).
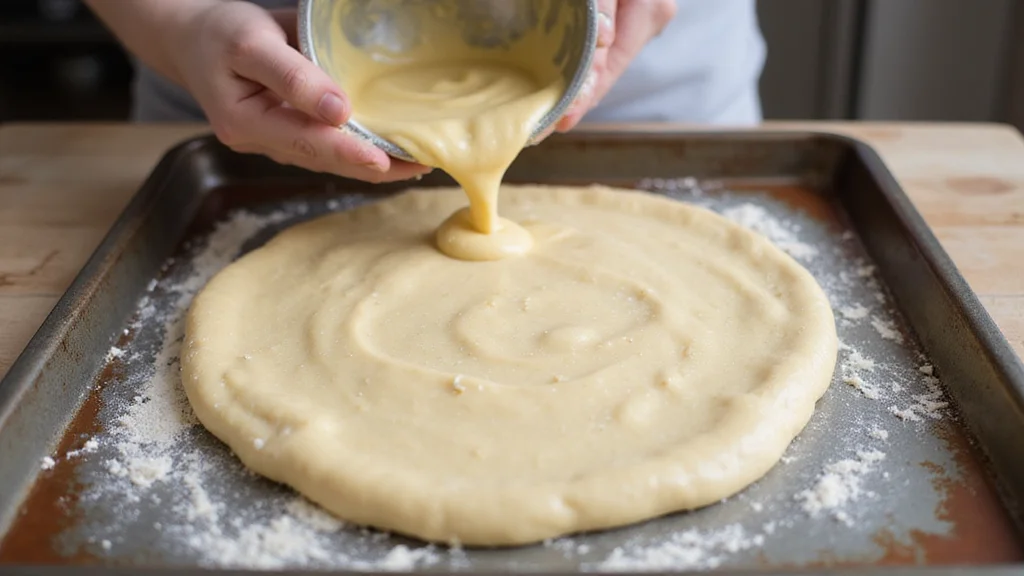
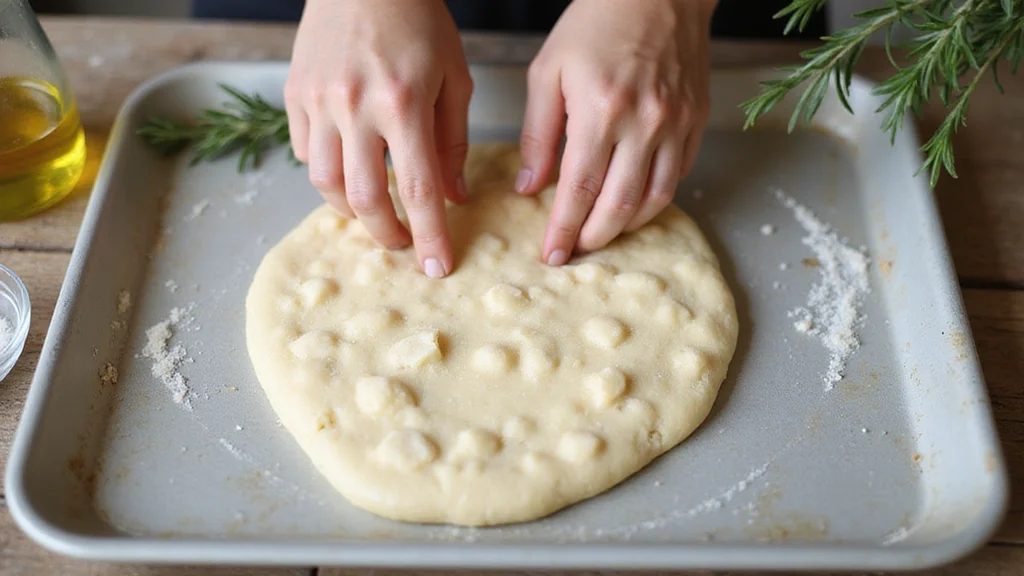
Drizzle olive oil over the surface of the dough.
Use your fingertips to create dimples across the top of the dough.
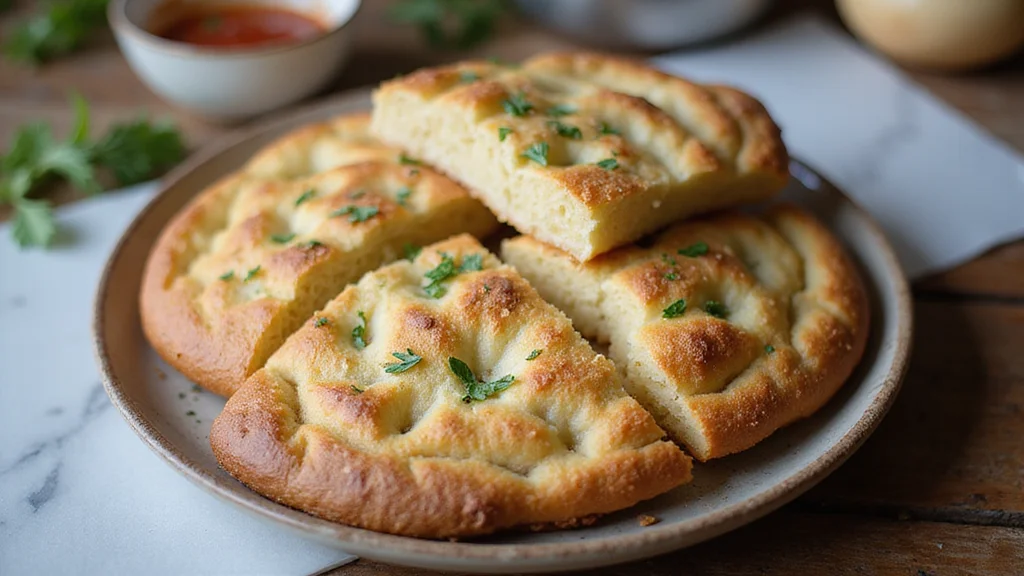
Sprinkle with coarse sea salt and fresh rosemary for flavor.
Step 9: Bake the Focaccia
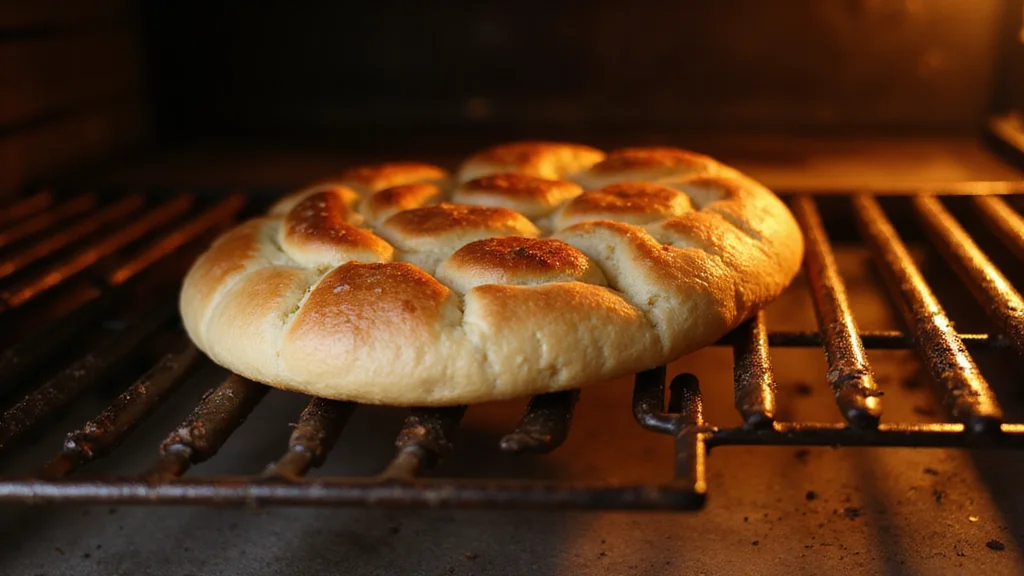
Place the baking sheet in the preheated oven on the middle rack.
Bake for 20-25 minutes until the top is golden brown and crispy.
Check for doneness by tapping the crust, which should sound hollow.
Rotate the pan halfway through baking for even coloring.
Step 10: Cool and Serve
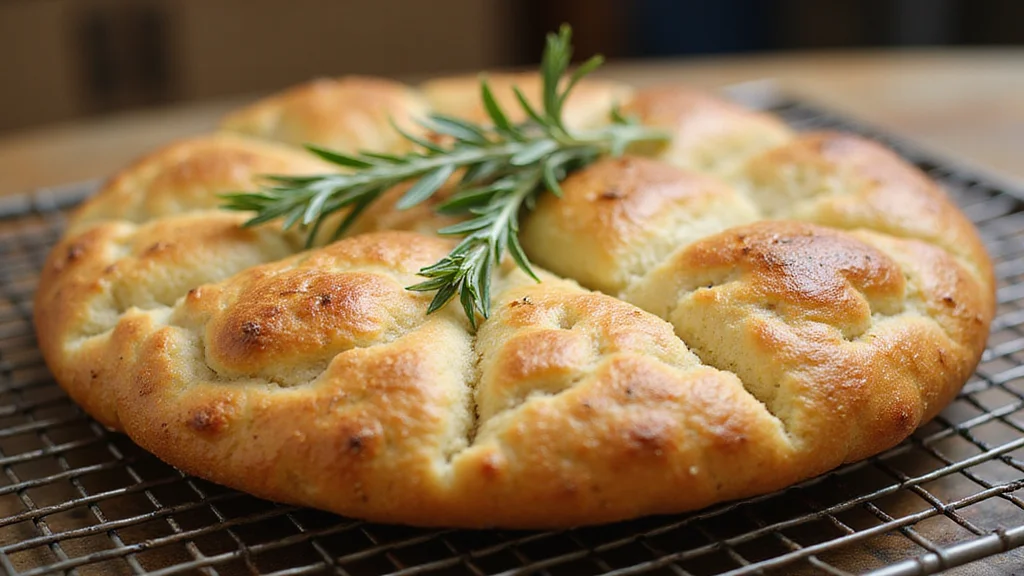
Remove the focaccia from the oven and let it cool on a wire rack.
Allow it to rest for at least 10 minutes before slicing.
The cooling period helps the crumb set and enhances flavor.
Serve warm or at room temperature with your favorite accompaniments.
Ultimate Sourdough Focaccia Recipe: Crispy, Chewy, and Full of Flavor
Ingredients
Method
- Remove your sourdough starter from the refrigerator, feed it with equal parts flour and water, and let it sit at room temperature until bubbly and doubled in size, about 4–6 hours depending on room temperature.
- In a large mixing bowl, combine the all-purpose flour and water. Stir until no dry flour remains, then cover the bowl with a damp towel and let the mixture rest for 30 minutes to autolyse and develop gluten.
- Add the activated sourdough starter and salt to the autolysed dough. Mix thoroughly by hand or with a dough scraper until the starter and salt are evenly distributed. The dough will be sticky but cohesive.
- With wet or lightly oiled hands, gently stretch one side of the dough up and fold it over itself. Rotate the bowl and repeat for all four sides. Cover and rest for 30 minutes. Repeat this stretch-and-fold cycle every 30 minutes for a total of four rounds to build strength.
- After the final stretch and fold, cover the bowl tightly with plastic wrap. Let the dough bulk ferment at room temperature for 4–6 hours, or until it has roughly doubled in size and shows visible bubbles on the surface. This slow fermentation develops flavor and structure.
- Generously oil a baking sheet with olive oil. Using a bench scraper, gently transfer the risen dough onto the pan. With oiled hands, carefully spread the dough toward the edges without deflating it, allowing it to relax and fill the pan. Let the dough rest for about 30 minutes.
- Cover the pan with a damp towel and let the dough proof at room temperature for 1–2 hours, or until puffy and noticeably increased in volume. Keep it in a warm, draft-free area for consistent proofing.
- Preheat the oven to 220°C (430°F). Drizzle the top of the dough with olive oil. Using your fingertips, press straight down to create deep dimples across the surface. Sprinkle coarse sea salt and chopped fresh rosemary evenly over the dough.
- Place the baking sheet on the middle rack of the preheated oven. Bake for 20–25 minutes, or until the focaccia is golden brown with a crisp top. Rotate the pan halfway through baking for even coloring. The crust should sound hollow when tapped.
- Remove the focaccia from the oven and transfer it to a wire rack to cool. Let it rest for at least 10 minutes to allow the crumb to set. Slice into squares or rectangles and serve warm or at room temperature, optionally finished with an extra drizzle of olive oil and a sprinkle of sea salt.
Nutrition
Critical Timing and Temperature Guide
Mixing and Resting: Mix flour and water, then rest for 30 minutes to autolyse. Ensure the room temperature is around 20-22°C (68-72°F) for optimal results.
Bulk Fermentation: Ferment the dough at room temperature for 4-6 hours until doubled in size. Avoid overproofing, as this can lead to a sour taste and dense texture.
Baking: Preheat oven to 220°C (430°F) and bake for 20-25 minutes. Look for a golden-brown crust and hollow sound when tapped to indicate doneness.
Pro Tips for Ultimate Sourdough Focaccia
• Ingredient Selection: Use high-quality olive oil and fresh rosemary for the best flavor. These ingredients significantly impact the final taste.
• Preparation Secret: Perform a cold retard in the fridge overnight after shaping to develop deeper flavors.
• Temperature Management: Maintain a consistent proofing temperature by using a proofing box or warm spot in your kitchen.
• Texture Enhancement: Ensure dough hydration by keeping it sticky. This contributes to the chewy, open crumb characteristic of great focaccia.
• Flavor Layering: Add different toppings like olives, tomatoes, or caramelized onions for complex flavor variations.
• Make-Ahead Strategies: Prepare dough a day ahead and refrigerate, allowing flavors to mature. Store in an airtight container.
• Restaurant-Quality Finishing Touches: Finish with a drizzle of fresh olive oil and a sprinkle of sea salt just before serving.
• Equipment Optimization: Use a pizza stone for baking to achieve an even, crispy crust. Preheat the stone in the oven before placing the dough on it.
Troubleshooting Common Issues
• Dense Texture: Caused by underproofing or insufficient gluten development. Ensure proper fermentation and use the stretch and fold technique.
• Sour Flavor: Results from overproofing or too cold fermentation. Monitor fermentation time and ambient temperature closely.
• Uneven Crust: May occur if the oven temperature is inconsistent. Use an oven thermometer to ensure accurate baking temperature.
• Dough Not Rising: Can stem from inactive starter or improper ingredient temperatures. Check starter activity and use room temperature water.
• Sticky Dough: Due to high hydration, manage with oil-coated hands and bench scraper during handling.
Variations and Regional Differences
• Genovese Style: This version uses extra olive oil and is topped with coarse salt and fresh herbs, reflecting its Ligurian roots.
• Focaccia di Recco: Known for its cheese filling, this version replaces traditional dough with a thin, unleavened pastry crust.
• Pugliese Focaccia: Features semolina flour in the dough and is often topped with cherry tomatoes and olives.
• Sweet Focaccia: A sweeter variation made with sugar and topped with fruits like grapes, popular in Tuscany.
Food Science Behind the Recipe
• Gluten Development: Gluten proteins in flour form a network during autolyse and stretch and fold, providing structure and elasticity.
• Fermentation: Yeast and bacteria in the sourdough starter ferment sugars, producing carbon dioxide and lactic acid, leading to leavening and flavor development.
• Maillard Reaction: Responsible for the golden-brown crust during baking, as proteins and sugars react under heat.
Frequently Asked Questions
What's the most common mistake people make when preparing Ultimate Sourdough Focaccia? Overproofing the dough is a common mistake, leading to a sour taste and dense texture.
Can I use whole wheat flour instead of all-purpose flour? Yes, but it will slightly alter the texture and flavor. Consider using a mix of whole wheat and all-purpose flour for balance.
How can I store leftover focaccia? Store in an airtight container at room temperature for up to two days, or freeze for longer storage.
Is it necessary to use a sourdough starter? A sourdough starter is crucial for authentic flavor and texture, but commercial yeast can be substituted for a quicker rise.
Why is my dough too sticky to handle? High hydration leads to stickiness; use oil-coated hands and a bench scraper to manage.
What toppings can I add to the focaccia? Popular options include olives, tomatoes, onions, and herbs. Customize according to taste.
Can I make the dough in advance? Yes, prepare the dough a day ahead and refrigerate to develop deeper flavors.
Serving and Presentation Guide
• Traditional Presentation: Serve sliced into squares or rectangles, arranged on a rustic wooden board with olive oil for dipping.
• Family-Style Serving: Place on a large platter at the center of the table, allowing guests to help themselves.
• Gourmet Presentation: Top with additional fresh herbs and a drizzle of balsamic reduction for a refined look.
• Picnic-Ready: Wrap individual slices in parchment paper for an easy, portable treat.
Conclusion
With its irresistible balance of crispy crust and chewy interior, this Ultimate Sourdough Focaccia promises to impress.
The straightforward preparation makes it accessible even for novice bakers, while the rich, complex flavors will delight any palate.
Give this recipe a try and bring a taste of Italian tradition to your table.


This focaccia recipe sounds amazing! I can almost smell it baking now. Do you think I could add some herbs from my garden to make it even more special?
I tried making focaccia once, but I think I accidentally created a new type of doorstop! 😂 I’ll definitely give this recipe a go and see if I can avoid that this time!