

How to Prepare Homemade Lox: A Step-by-Step Guide
The art of making homemade lox brings the tradition of curing fish to your kitchen, offering a taste that is both rich and delicately refined.
The silky texture and subtle salty flavor of lox make it a staple in many brunch gatherings and morning spreads.
I first fell in love with the process of making lox during a visit to a quaint deli in New York City, where I was inspired by the craftsmanship involved.
Perfect for any season, lox pairs beautifully with fresh bagels, cream cheese, and a sprinkle of capers.
Whether you’re a brunch enthusiast or a culinary explorer, preparing homemade lox is sure to impress.
Join me as we delve into the step-by-step journey of making this delightful dish at home.
The History and Cultural Significance
• Lox traces its origins to Eastern Europe, where it was originally created as a means of preserving fish before refrigeration.
• The dish evolved over decades as curing techniques improved and salmon became more accessible, eventually becoming the beloved version we know today.
• In Jewish culture, lox traditionally appears at brunch gatherings and holiday celebrations, symbolizing prosperity and continuity.
• While many variations exist across different regions, the authentic version maintains a silky texture and balanced salinity that sets it apart from imitations.
Recipe Overview
Nutritional Information (per serving)
Essential Equipment Guide
Sharp Knife: A sharp knife is crucial for slicing the lox thinly and evenly, which is essential for achieving the delicate texture that characterizes high-quality lox. Alternatives include a high-quality chef’s knife or a slicing knife designed for fish. Look for a knife with a long, flexible blade for the best results.
Curing Tray: A curing tray allows the fish to cure evenly without soaking in its own juices, which can affect the texture. A shallow glass or ceramic dish can work as an alternative. Ensure the tray is large enough to hold the fish flat.
Plastic Wrap: Plastic wrap is important for tightly sealing the fish during the curing process to prevent air exposure and moisture loss. Aluminum foil can be used as an alternative, ensuring a snug fit to maintain the curing environment.
Ingredients
For the Lox
|
|
| Amount | Ingredient | Notes |
|---|---|---|
| 2 pounds | salmon fillet | skin-on, the freshest quality available |
| 1 cup | kosher salt | for curing, ensures proper texture |
| 1 cup | sugar | balances the saltiness |
| 1 tablespoon | black pepper | freshly ground, for a subtle kick |
Optional Flavorings
| Amount | Ingredient | Notes |
|---|---|---|
| 1 bunch | dill | fresh, enhances flavor |
| 1 tablespoon | lemon zest | for a hint of citrus |
Preparation Methods
Dry Curing: Dry curing involves coating the salmon with a mixture of salt and sugar, drawing out moisture to create a firm texture and concentrated flavor. It's crucial to apply the cure evenly and wrap the fish tightly in plastic wrap to ensure proper curing.
Flavor Infusion: Adding herbs and spices during curing infuses the fish with additional flavors. Press the flavorings gently into the surface of the fish before wrapping to ensure they adhere and impart their essence throughout the curing process.
Thin Slicing: Once cured, slicing the salmon thinly is key to achieving the classic lox texture. Use a sharp knife to make long, even cuts, angling the blade slightly to create broad, thin slices.
Step 1: Prepare the Curing Mixture
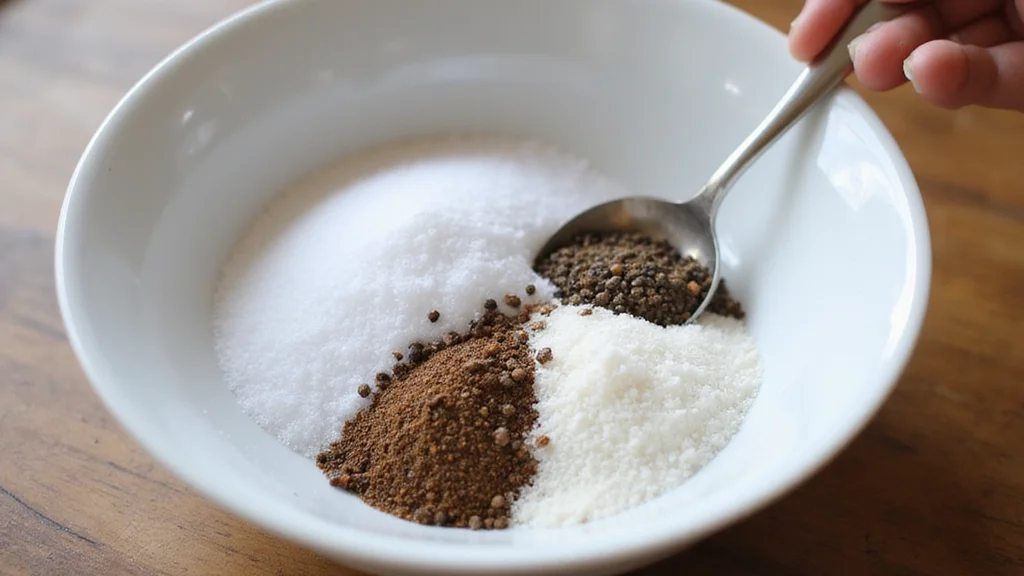
Mix the kosher salt and sugar in a bowl until well combined.
Add freshly ground black pepper to the mixture.
Ensure the mixture is evenly distributed to prevent any overly salty or sweet spots.
Use your hands or a spoon to mix thoroughly.
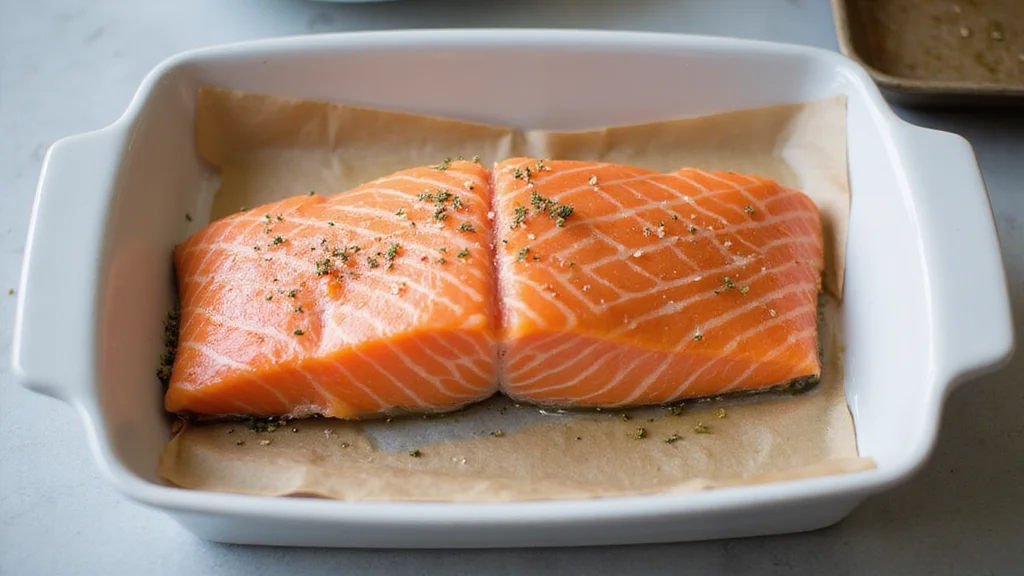
Step 2: Prepare the Salmon
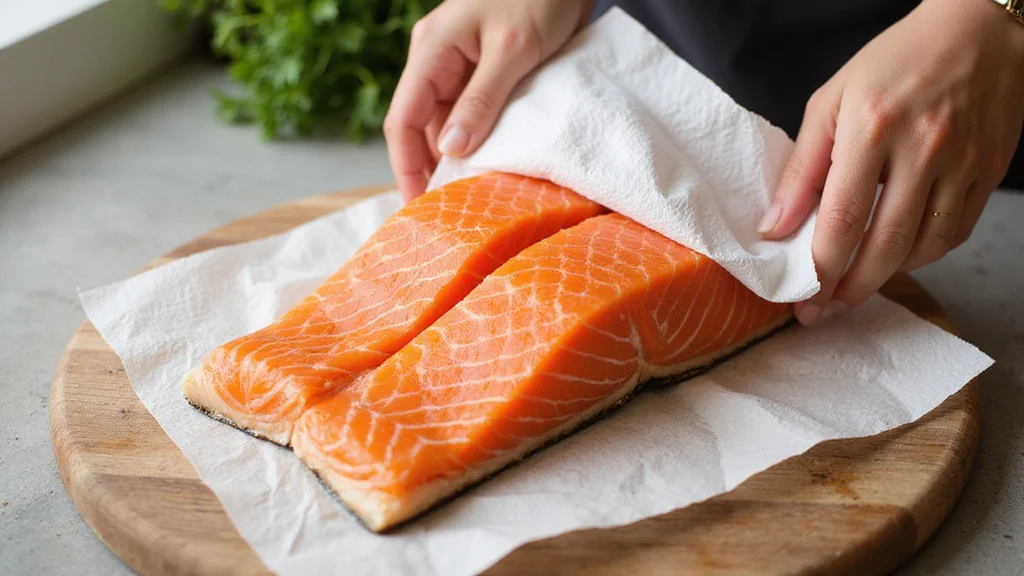
Place the salmon fillet on a clean cutting board, skin side down.
Check for any remaining pin bones and remove them with tweezers.
Pat the fillet dry with paper towels to remove excess moisture.
Ensure the salmon is fresh and has a vibrant color.
Step 3: Apply the Curing Mixture
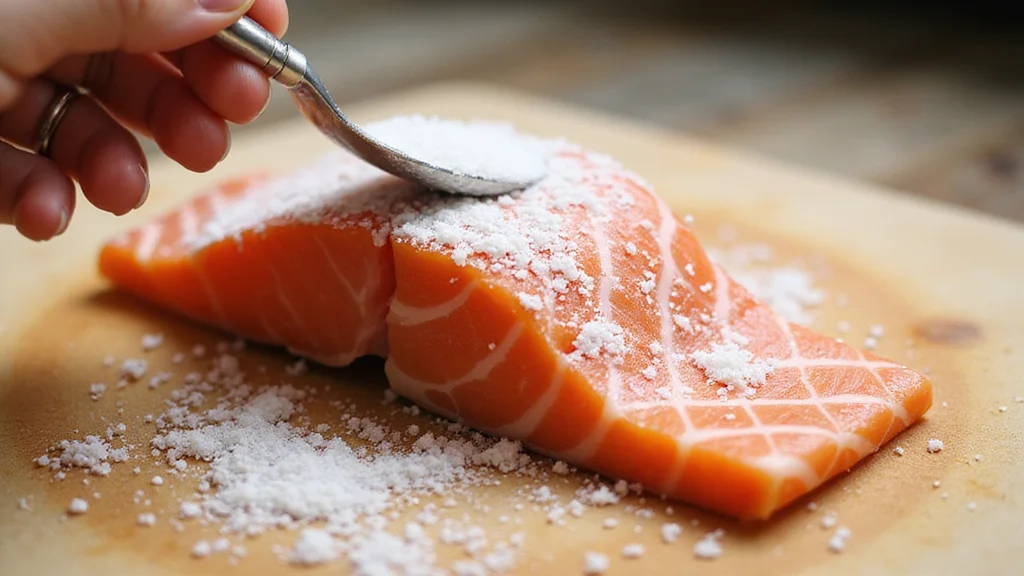
Spread a layer of the curing mixture evenly over the skin side of the salmon.
Flip the salmon and generously coat the flesh side with the remaining mixture.
Ensure all parts of the salmon are covered to allow even curing.
Press the mixture gently into the fish to help it adhere.
Step 4: Add Optional Flavorings
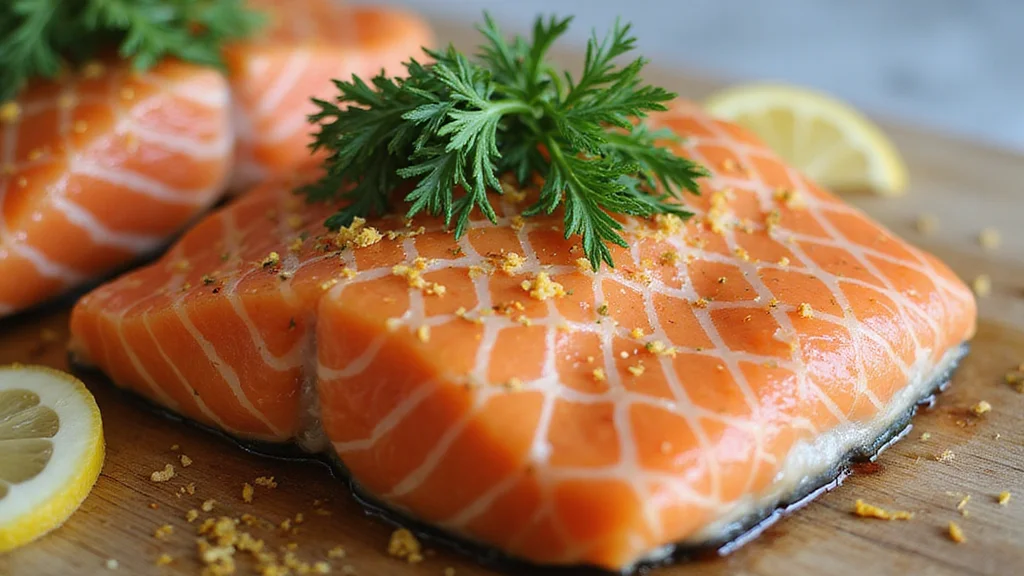
If using, sprinkle fresh dill and lemon zest over the cured side of the salmon.
Press gently to ensure they adhere to the surface.
Distribute the flavorings evenly for consistent taste.
Check that all added ingredients are fresh and aromatic.
Step 5: Wrap the Salmon

Place the salmon fillet on a large sheet of plastic wrap.
Wrap the fish tightly, ensuring no air pockets remain.
Use additional layers of plastic wrap if necessary to seal completely.
Check for a snug fit to prevent air exposure during curing.
Step 6: Cure the Salmon
Place the wrapped salmon in a curing tray or dish.
Weight it down with a small baking sheet or similar object.
Refrigerate for 24 to 48 hours, depending on desired saltiness.
Ensure the dish is level to promote even curing.
Step 7: Rinse and Dry the Salmon

Remove the salmon from the refrigerator and unwrap it.
Rinse the fillet under cold water to remove the curing mixture.
Pat the salmon dry with clean paper towels.
Ensure all the curing mixture is washed away for balanced flavor.
Step 8: Slice the Lox

Place the cured salmon on a clean cutting board, skin side down.
Using a sharp knife, slice the salmon thinly at a slight angle.
Aim for long, even slices to maintain texture.
Ensure slices are thin enough to be translucent when held up to light.
How to Prepare Homemade Lox: A Step-by-Step Guide
Ingredients
Method
- In a bowl, mix the kosher salt and sugar until well combined. Add freshly ground black pepper and stir until evenly distributed so there are no overly salty or sweet spots.
- Place the salmon fillet on a clean cutting board, skin side down. Check for any remaining pin bones and remove them with tweezers. Pat the fillet dry thoroughly with paper towels to remove excess moisture.
- Spread a layer of the curing mixture evenly over the skin side of the salmon. Flip the salmon and generously coat the flesh side with the remaining mixture, pressing gently so it adheres and covers the fish evenly.
- If using, sprinkle fresh dill and lemon zest evenly over the cured flesh side of the salmon. Press gently to help the herbs and zest adhere to the surface for even flavor infusion.
- Place the seasoned salmon fillet on a large sheet of plastic wrap. Wrap the fish tightly, ensuring there are no air pockets. Add additional layers of plastic wrap if needed to create a snug seal.
- Set the wrapped salmon in a curing tray or shallow dish. Place a small baking sheet or similar weight on top to press it gently. Refrigerate for about 12 hours or longer depending on desired firmness and saltiness, keeping the dish level for even curing.
- Remove the salmon from the refrigerator and unwrap it. Rinse the fillet under cold running water to remove the curing mixture, then pat dry thoroughly with clean paper towels to achieve the desired texture.
- Place the cured salmon on a clean cutting board, skin side down. Using a sharp, flexible knife, slice the salmon thinly at a slight angle into long, even slices. Serve the lox with bagels, cream cheese, capers, red onion, and lemon wedges.
Nutrition
Critical Timing and Temperature Guide
Salmon Curing: Cure the salmon for 24-48 hours in the refrigerator; longer curing results in a firmer, saltier lox. Avoid opening the wrap during curing to maintain a consistent environment.
Rinsing and Drying: Rinse the salmon under cold water after curing to remove excess salt. Ensure thorough drying with paper towels to achieve the desired texture and avoid sogginess.
Slicing: Keep the salmon chilled before slicing to maintain firmness. Slice just before serving to ensure freshness and prevent drying out.
Pro Tips for How to Prepare
• Ingredient Selection: Choose the freshest salmon available, preferably wild-caught, for the best flavor and texture. Freshness is crucial for both safety and taste.
• Preparation Secret: A light dusting of sugar over the top after rinsing can subtly enhance sweetness and balance flavors.
• Temperature Management: Always keep the salmon refrigerated during curing and before serving to prevent spoilage and ensure optimal texture.
• Texture Enhancement: Use a sharp, flexible knife for slicing to achieve thin, uniform slices that melt in your mouth.
• Flavor Layering: For a more complex flavor, experiment with adding juniper berries or coriander seeds to the curing mixture.
• Make-Ahead Strategies: Prepare the lox up to two days in advance, storing it tightly wrapped in plastic wrap in the refrigerator to preserve freshness.
• Restaurant-Quality Finishing Touches: Garnish with fresh dill or capers and serve with lemon wedges for an elevated presentation.
• Equipment Optimization: Use a mandoline for consistent, thin slices if a sharp knife is unavailable.
Troubleshooting Common Issues
• Texture Too Firm: Over-curing can result in a dense texture. To fix, reduce curing time by a few hours and ensure even distribution of the curing mixture.
• Flavors Unbalanced: If the lox is too salty, adjust sugar levels in the cure or reduce curing time to moderate the saltiness.
• Fish Smells Off: Ensure the salmon is fresh before starting and always keep it refrigerated during curing to prevent spoilage.
• Uneven Curing: Make sure the entire fillet is covered with the curing mixture and wrapped tightly to ensure consistent curing.
• Slices Falling Apart: Use a sharp knife and slice the salmon while cold to maintain integrity; practice gentle slicing to avoid tearing.
• Too Dry: Avoid overcooking by keeping the curing time within recommended limits and ensuring the salmon is properly wrapped during curing.
Variations and Regional Differences
• Scandinavian Gravlax: This version includes dill and sometimes aquavit, imparting a unique flavor profile with a cultural nod to Nordic traditions.
• New York-Style Lox: Typically saltier and often smoked, this variation is a staple in Jewish delis across the city, known for its rich, smoky flavor.
• Nordic Beet-Cured Lox: Incorporates grated beets in the curing mixture, giving the lox a striking red hue and a subtly sweet, earthy flavor.
• Spicy Lox: Adds crushed red pepper or jalapeños to the curing mixture for a spicy kick, reflecting modern culinary twists on the classic recipe.
Food Science Behind the Recipe
• Osmosis in Curing: The curing process relies on osmosis, where salt draws moisture out of the salmon while infusing it with flavor, enhancing preservation and texture.
• Molecular Structure of Proteins: The salt denatures proteins in the salmon, altering its texture to become firmer and more palatable, a crucial step in the lox-making process.
• Flavor Chemistry: Sugar balances the salt, creating a complex flavor profile by interacting with the salmon's natural oils and enhancing sweetness.
Frequently Asked Questions
What's the most common mistake people make when preparing lox? Over-curing the salmon, resulting in a too-salty and overly firm texture. It's important to check the fillet's firmness and taste periodically.
Can I use frozen salmon for making lox? Yes, but ensure it's thoroughly thawed and dried before starting the curing process to achieve optimal results.
How can I add a unique twist to my lox? Consider incorporating herbs like dill, or spices such as juniper berries, into the curing mixture for a personalized flavor.
How long can I store homemade lox? Properly cured and stored lox can be kept in the refrigerator for up to five days, tightly wrapped to maintain freshness.
Can I freeze lox? Yes, lox can be frozen for up to a month. Wrap it tightly in plastic wrap and place it in an airtight container to prevent freezer burn.
What type of salmon is best for lox? Fresh, high-quality Atlantic or wild-caught sockeye salmon are preferred for their rich flavor and firm texture.
Is it necessary to use sugar in the curing mixture? While not essential, sugar balances the saltiness and enhances the natural flavors of the salmon.
Serving and Presentation Guide
• Traditional Presentation: Serve thin slices of lox on a platter with bagels, cream cheese, capers, and red onion slices for a classic brunch spread.
• Modern Twist: Arrange lox on a cutting board with artisanal breads, assorted cheeses, and fresh fruit for a contemporary take on a charcuterie board.
• Minimalist Approach: Present lox slices on a simple white platter with a few sprigs of dill and lemon wedges for a clean, elegant presentation.
• Interactive Display: Create a DIY bagel bar with various toppings and spreads, allowing guests to customize their own lox bagels.
Conclusion
Embarking on the journey of making homemade lox is a rewarding experience that brings a touch of gourmet flair to your kitchen.
With just a few simple ingredients and techniques, you can create a delicacy that rivals any deli.
I encourage you to try this recipe and discover the joy of crafting your own delicious lox at home.


I loved your guide on making lox! I always thought it was super complicated, but you made it sound so easy. Have you tried any unique toppings with it?
Thank you for your kind words! I’m glad you found the guide helpful. As for unique toppings, I’ve tried cream cheese with dill and capers, as well as avocado with a sprinkle of everything bagel seasoning. Both add a nice twist to the traditional lox! Have you experimented with any toppings?
This post is great! I once tried making lox and ended up with a fishy kitchen for days—my cat was in heaven! What’s the funniest cooking mishap you’ve had?
Did you know that lox dates back to ancient times when it was a way to preserve fish? It’s amazing how food connects us through history!
I remember the first time I tried lox; I was at a brunch with friends and felt so fancy! Now, I can’t wait to make it myself. What’s your favorite way to serve it?
Hi Ava! I love serving lox on a bagel with cream cheese, capers, and a sprinkle of dill. It’s a classic combo that really brings out the flavors! Enjoy making your homemade lox!
If you’re making lox, don’t forget to pair it with some cream cheese and capers for the best flavor! It’s such a classic combo.
Absolutely! Cream cheese and capers really elevate the flavors of lox. Thanks for the suggestion!